3D Printed Arm
Steve was directed to the Specialist Mobility Rehabilitation Centre at Preston for their opinion. Upon visiting the centre, Steve was to meet Dr Jepson, a rehabilitation consultant who has access to both Prosthetic and Orthotic services. Unfortunately the Prosthetic service was unable to assist, however, Gordon Steel an Orthotist within the centre knew of an organisation that could help and contacted Crispin Orthotics to discuss the possibility of creating this unique Prosthetic arm.
It wasn’t something we had been asked to create before, however we revelled in the opportunity to use our innovative technology to develop and manufacture such a device.
We started with a 3d scan of Steves torso which was taken using our white light scanner, accurate to within 0.5mm, see here The scan creates a virtual 3d model (see right) which can be inserted into our computer aided design software.
Using the software, we created a virtual jacket which fits exactly around the model. We then designed a shoulder plate for attachment of the prosthesis which was integrated into the jacket (see far right).
It was then on to the design of the arm! Steve had some specific requests for the design which were based on his current self engineered prosthesis. These were: The arm to be removable from the jacket and allow for the shoulder section to have lockable flexion/extension. The upper arm section to have a quick release for emergency removal of the prosthesis if required. The elbow joint to flex and extend but also to rotate to allow for movement side to side to reach the various switches within the aircraft. The forearm to have a sliding mechanism which could be locked and free, therefore when flying the sliding mechanism could be unlocked and therefore any torso movement would not affect the throttle control. The hand section to be on a ball and socket joint with a locking mechanism which would grip the throttle control.
Some list to get our teeth into!! The initial designs were created with simple 2d sketches that were then imported into our computer aided design software to create a 3d representation of the final design (See right).
Within our software we can create virtual joints which demonstrate the movement of the arm to help give an indication as to whether the prosthesis would work as per Steve’s requirements.
We also created some mounts for a clock and stopwatch on the forearm section of the prosthesis.
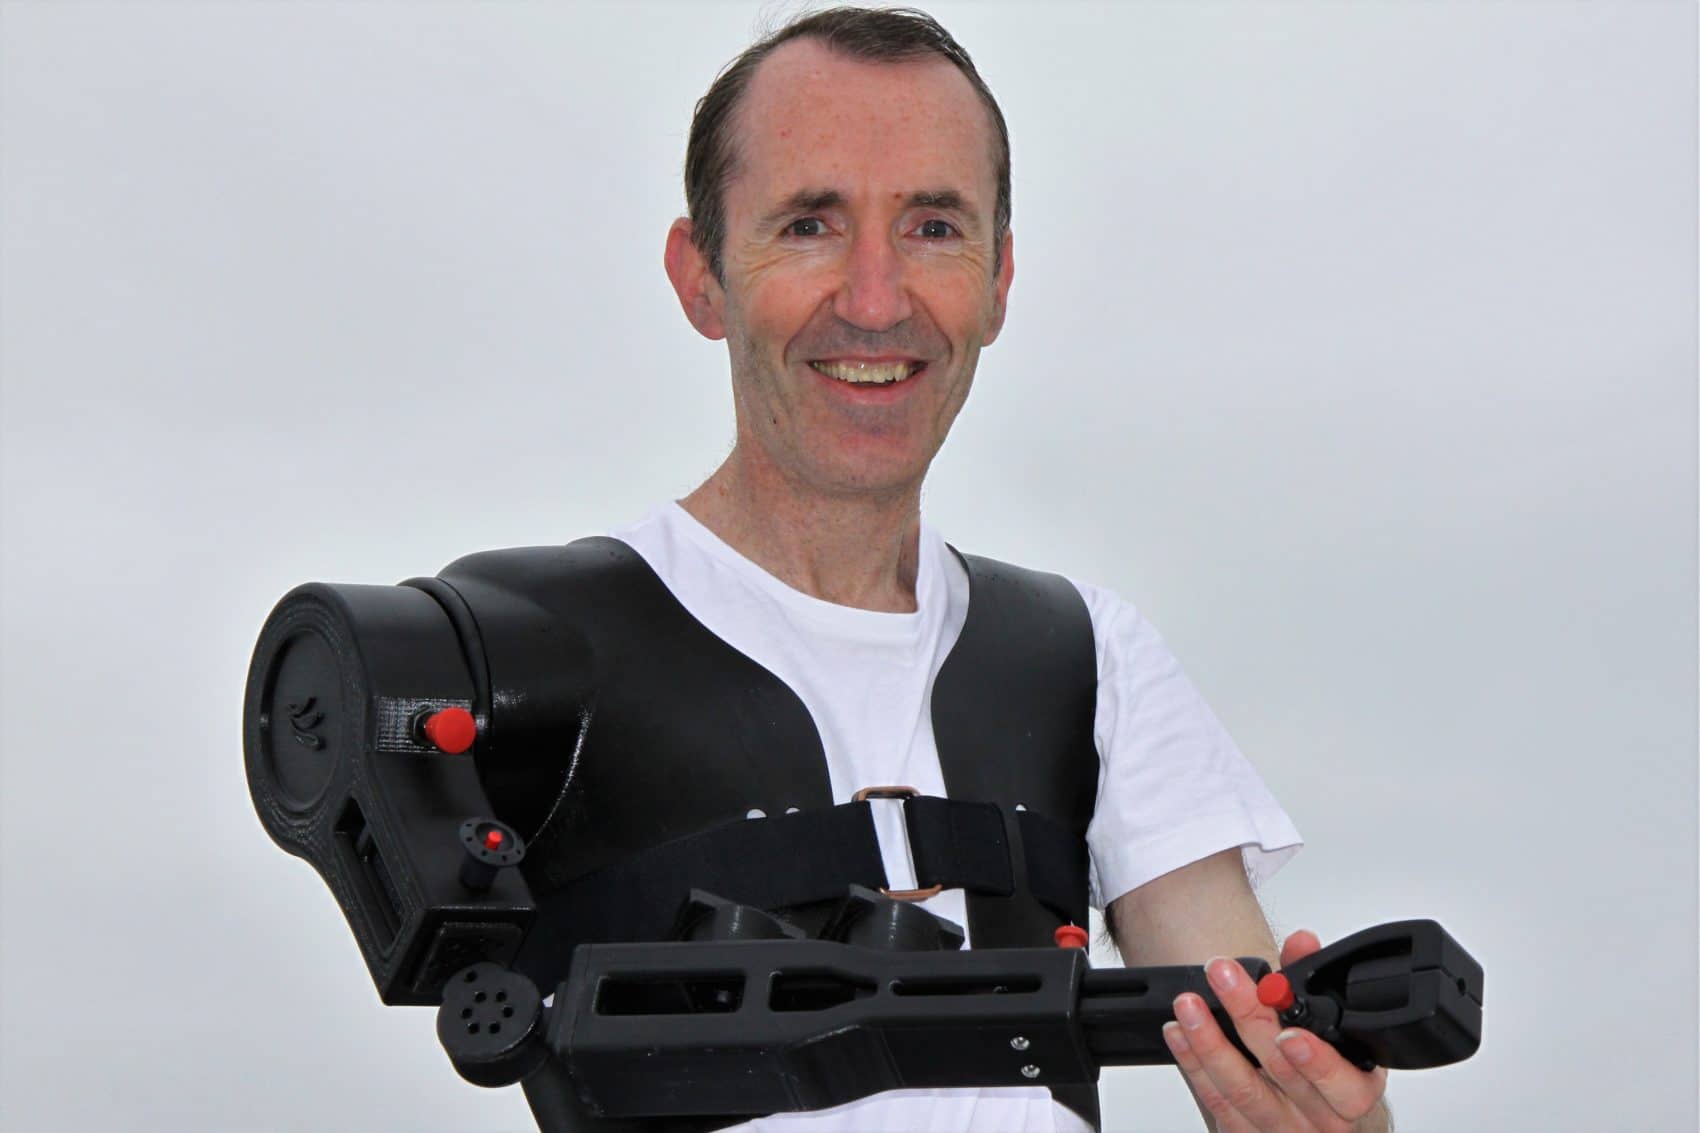
We had our final design!! All well and good but we haven’t seen anything physical yet! Fortunately, our investment into 3d technology doesn’t stop at the scanning and modelling, we can also 3d print our designs. We have invested in large scale 3d printing technology using robust thermoplastics which can be used functionally. The design created for the arm, was split into its various components and sent to our printer for the exciting part, the creation of a physical model. We decided to use a nylon type material due to its strength and therefore minimising failure. Its not the easiest of materials to print in and aesthetically the prints are not as cosmetic as some of the other materials available however we were please with the overall appearance of the finished prosthesis.
The fitting day was upon us and to test the functionality of the prosthesis we took the arm to the airfield to try whilst seated in the plane. All the components worked well together and Steve was able to put the prosthesis on without assistance. We expected it would work but it was great to see it in action. All that’s left is for the arm to be approved for flight.
We will keep you posted following its initial test flight.